


Long exposure photography is one of the easiest ways for beginners to create dramatic, professional-looking images. Light trails, silky waterfalls, misty oceans, smooth clouds, glowing night scenes—these effects are all achieved simply by using longer shutter speeds.
Table of Contents
1.What Exactly Is Long Exposure?

Long exposure means using a slow shutter speed so the camera sensor gathers light for a longer time than usual.
Typical shutter speeds:
- Normal shooting:
1/125s,1/250s - Long exposure:
1s,5s,20s,30s, or even minutes
This creates two key effects:
- Static objects (buildings, mountains, signs) look crisp and bright.
-
Moving elements blur or stretch across the frame:
- Cars → light trails
- Water → silky or milky texture
- People → ghost-like or disappear
- Stars & clouds → streaks or flowing patterns
Because slow shutter speeds make the camera very sensitive to vibration, a tripod is essential.
2.Essential Gear for Long Exposure Photography
Camera
Any camera that allows manual control of shutter speed, aperture, and ISO can be used:
- Mirrorless or DSLR is ideal.
- Many advanced compact cameras also work.
- BULB mode is helpful for exposures longer than 30 seconds.
Tripod
A long exposure shot is only as sharp as your tripod is steady:
- Use a stable tripod, not a flimsy travel stand.
- In windy conditions, hang your camera bag under the center column for extra stability.
Remote Shutter / Intervalometer / Camera App
These help avoid camera shake caused by pressing the shutter:
- Wired or wireless remote release
- Intervalometer for time-lapse or star trails
- Brand-specific smartphone apps that can control the camera remotely
ND Filters (For Daytime Long Exposure)
In bright daylight, you must reduce light entering the lens to use slow shutter speeds. Neutral density (ND) filters do this.
- Common strengths: ND8, ND64, ND1000
- Higher numbers = stronger light reduction
- Very useful for waterfalls, seascapes, and traffic in the daytime
External Power (For Night, Star Trails, and Time-Lapse)
Long exposure and time-lapse work often means the camera is powered on for hours. This drains batteries quickly, especially:
- At night
- In cold weather
- When shooting star trails or multi-hour time-lapse
- In remote locations with no wall outlets
In those situations, you will want a larger external power system—such as a LiFePO₄ battery from LiTime—to keep your entire setup running (camera charger, lights, laptop, drone batteries, and more).
3.How to Set Your Camera for Long Exposure
A simple rule to remember:
Shutter controls motion; aperture and ISO control brightness and noise.
Night Cityscapes and Light Trails
- Mode: Manual (M)
- Aperture: f/8–f/11
- ISO: 100–400
- Shutter: 10–30 seconds
Adjust if needed:
- Too bright → narrow the aperture, lower ISO, or add ND.
- Too dark → lengthen the shutter speed.
Waterfalls and Seascapes (Silky Water)
- Mode: Manual (M)
- Aperture: f/8–f/16
- ISO: 50–100
- ND filter: ND8, ND64, or ND1000 depending on light
- Shutter:
- 0.5–2 seconds for subtle motion
- 2–10 seconds for very soft, dreamy water
Star Photography and Star Trails
For sharp stars (no visible trails):
- Use the 500 rule: Shutter (in seconds) ≈ 500 ÷ focal length (full-frame equivalent).
- Aperture: as wide as possible (e.g., f/1.4–f/2.8).
- ISO: 1600–6400, depending on your camera’s noise performance.
For star trails:
- Shutter: 15–30 seconds per frame
- Interval: 1–3 seconds between frames
- Shoot continuously for 30 minutes to several hours
- Stack the images later in software (e.g., StarStaX)
This type of shoot can drain batteries fast, which is why a robust external power source is very useful.
4.Practical Long Exposure Shooting Recipes
1. City Overpass Light Trails
- Mode: M
- Aperture: f/8
- ISO: 100–200
- Shutter: 10–20 seconds
Tip: Shoot during blue hour so the sky retains color and the overall scene looks richer.
2. Misty Ocean or Foggy Coastline
- Mode: M
- Aperture: f/11
- ISO: 50–100
- ND filter: ND1000 (or similarly strong)
- Shutter: 20–30 seconds
Tip: Use rocks and shorelines as foreground elements to add depth.
3. Forest Waterfalls
- Mode: M
- Aperture: f/8–f/11
- ISO: 100
- Shutter: 0.5–2 seconds
- Use ND filters in bright daylight if needed.
Tip: Keep a microfiber cloth handy—water spray will quickly cover your front element.
4. Star Trails and Milky Way
- Mode: M
- Aperture: f/1.4–f/2.8
- ISO: 1600–3200
- Shutter: 15–25 seconds (for each frame)
Tip: Always check weather, moon phase, and light pollution maps in advance. For multi-hour sessions, bring a high-capacity external battery to power your camera and accessories all night.
5.Powering Long Outdoor Shoots: LiTime Battery Recommendations
If you plan to shoot long exposures outdoors—especially star trails, time-lapses, or remote seascapes—power quickly becomes a limiting factor. Your setup might include:
- Camera battery chargers
- Dummy batteries with DC power for continuous operation
- LED lights or camping lights
- Drone batteries
- Laptop for backup or tethering
- Phones, tablets, and other devices
A large-capacity LiFePO₄ battery like those from LiTime can act as the central power hub for all of this.
Why Use LiFePO₄ (LiTime) Batteries?
- Very long cycle life (thousands of charge cycles)
- Stable voltage output for sensitive electronics
- High safety compared to many other chemistries
- Perfect for RVs, camping, off-grid setups, and serious outdoor photographers
A LiTime battery cannot be inserted directly into a camera. Instead, you use it to power:
- A pure sine wave inverter + your camera’s original charger
- DC-DC converters plus a dummy battery that matches your camera model
- USB-C PD chargers for cameras that support USB charging
Option 1: Weekend Night Shoots – 12V 100Ah Class (e.g., LiTime 12V 100Ah Mini)
- Ideal for short trips, city night photography, and basic astro sessions.
- Enough capacity to recharge camera batteries many times, plus power a laptop and LED lights.
- Still reasonably compact and portable—good for car-based photography.

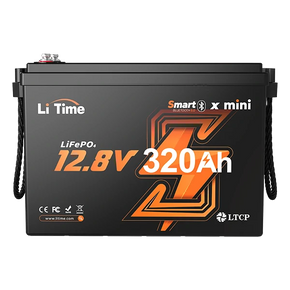
Option 2: Multi-Day / RV / Heavy Power Use – 12V 320Ah Mini Bluetooth (e.g., LiTime 12V 320Ah Mini Bluetooth Lithium Battery)
- Designed for RVs, camping, and heavy off-grid use.
- Built-in 200A BMS (Battery Management System).
- Provides up to 2560W continuous output and supports 1000A peak discharge for 1 second.
- Can run multiple devices at once: several camera chargers, drone chargers, laptops, lights, and even small appliances in your RV or car.
- Bluetooth monitoring lets you check remaining capacity and status from your phone.

Option 3: Winter and Cold Environments – LiTime 12V 320Ah Mini Smart Self Heating Lithium Battery
- For snow, aurora, or high-altitude star photography, choose LiTime models with low-temperature charging protection.
- Keep the battery in your car or an insulated box and run cables out to your gear to maintain performance.
Key takeaway: A larger LiTime battery will not make your camera charge faster (charging speed is limited by the charger and the camera battery), but it will let you charge more often and power more devices for much longer.
Looking for a different size or capacity? Browse our 12V battery range.
6.Common Long Exposure Mistakes and How to Avoid Them
Blurry Images
Possible causes:
- Unstable tripod
- Pressing the shutter by hand
- Wind shaking the camera
- Image stabilization left on while on a tripod (on some systems)
Fixes:
- Use a sturdy tripod and hang weight under it if needed.
- Trigger the shutter with a remote or 2-second timer.
- Turn off stabilization when the camera is firmly mounted.
Images Too Bright or Too Dark
Adjust in this order:
- Shutter speed
- Aperture
- ISO
- Add or remove ND filters (especially in daytime)
Focus Problems at Night
- Use Live View and zoom in 5–10x to focus on a bright object.
- Switch to manual focus once you are sharp.
- Avoid relying on autofocus in very dark scenes.
7.Conclusion
Long exposure photography is one of the most rewarding techniques you can learn. With a tripod, some basic settings, and a bit of experimentation, you can create images that capture the passage of time in a single frame.
When you start shooting long exposures outdoors—especially star trails, time-lapse, or multi-night trips—power quickly becomes a critical part of your kit. A reliable LiTime LiFePO₄ battery can keep your camera, lights, laptop, and other devices running for hours or even days, turning your car or campsite into a mobile photo workstation.
Master the fundamentals, plan your shots, and make sure your power setup is as solid as your tripod. Then you can focus on what matters most: creating the long exposure images you’ve always imagined.


