


I. Preparation and Tools
1. Essential Tool List
Recommended tools:
- Phillips or flathead screwdriver
- Hex keys / Allen wrenches (depending on frame and bracket design)
- Plastic pry tools or scrapers (to open the case without scratching it)
- Insulated gloves
- Multimeter (for measuring voltage)
- Electrical tape and zip ties (for securing wiring and temporary insulation)
If you plan to repair or modify the pack further, you may also need:
- Soldering iron, solder, and flux
- Nickel strips and a spot welder (for upgrading or replacing nickel bus bars)
- Heat-shrink tubing and waterproof tape
2. Safety Checks Before Disassembly
Before starting, do a full safety check:
-
Check the environment
- Work in a dry, well-ventilated area away from flammable materials.
- Stay away from open flames and loose metal debris.
-
Check the outer case
- Inspect the battery housing for swelling, cracks, or melted spots.
- If there is serious deformation or a burning smell, do not continue disassembly. It is safer to send the pack directly for professional recycling.
-
Measure the voltage
- Use a multimeter to measure voltage at the battery output terminals.
- Zero or near-zero voltage does not automatically mean “safe” – the BMS may have tripped or there may be an internal fault.
-
Disconnect the bike
- Before removing the battery, turn the bike off, remove the key (if present), and disconnect all connectors going to the bike.
3. Typical Issues When Removing the Battery
In the reference teardown, three typical issues appeared:
- The battery had no output at all and the bike would not power on.
- The recycler only left the battery and bracket, but no key.
- The bracket clamped the battery tightly, so it could not slide out in the normal way.
This is common with used or salvaged packs: no key, no original bike, only a battery that looks “OK” from the outside. In such a case, opening the pack is often the only way to know its true condition.
II. How to Access and Remove the Serengeti 48V Battery

1. Locating the Battery
On most Serengeti 48V e-bikes, the battery is commonly located:
- On the down tube (bottle-style battery)
- Under or inside the rear rack or rear cargo box
- Inside an integrated tube compartment (seat tube or down tube)
Follow the power cables and charging port to identify the approximate location. The battery case usually includes:
- A key lock
- Battery level indicator LEDs (if any)
- A charging port
- A bottom rail or mounting bolts
2. Normal Removal (With a Key)
If you have the key, the standard process is:
- Switch off the main power and remove the key.
- Insert and turn the key to the “unlock” position.
- Support the battery with one hand and gently push or pull it along the rail.
- Once the battery slides out far enough, disconnect the power and signal connectors (if any).
- Place the battery on a stable workbench for further inspection.
This does not damage the original structure and is the safest way to remove the pack.
3. Removal Without a Key (For Understanding Only)
In many salvage or second-hand scenarios, the key is missing. In such cases, people sometimes use a more forceful method. This description is for structural understanding and is not a recommendation for casual users.
-
Push from one end
- Push the battery firmly from one end to make it partially slide out of the bracket.
- The bracket limits movement, but you may expose some edges or seams.
-
Remove rear screws and loosen the bracket
- Check if there are fixing screws at the rear of the bracket.
- Remove (or in extreme cases, break) these screws so the bracket no longer clamps the battery tightly.
- Once the screws are removed, the battery may slide out or the case can be partially opened.
-
Separate the battery and bracket
- With the bracket loosened, pull / push / pry the battery and its case away from the mount.
- Be careful not to pull on internal wiring.
Note:
- This “brute force” approach may damage the bracket or case and is not suitable if you want to reuse the original battery assembly.
- If your goal is to rebuild and reinstall the pack, it’s better to obtain a matching key or seek help from a professional technician.
4. Opening the Battery Case
After removing the battery from the bike, you can open the case:
- Locate the seam where the top and bottom halves of the case meet.
- Use a plastic pry tool to gently work along the seam.
- If there are hidden clips, pry and twist gently to release them one by one.
- Avoid sharp metal tools that could pierce cell insulation or cause injury.
Key points:
- Do not push tools too deep into the case to avoid damaging cells or wiring.
- Once the case starts to open, support the pack so the cell block doesn’t suddenly fall out.
- If you plan to reuse the case, minimize cracking and damage to preserve its waterproofing and strength.

III. Inside the Serengeti 48V Battery
1. BMS (Battery Management System)
In this teardown, the BMS shows these characteristics:
- Several MOSFETs on the board control charge and discharge current.
- Basic over-current protection that cuts off output when current is too high.
- Uses voltage drop measurement to estimate current and perform current limiting.
- No visible cell-balancing circuit for active or passive balancing.
Implications:
- Over time, series cell voltages drift apart.
- Without balancing, some cells reach full charge or empty earlier than others.
- Eventually, some cells may be overcharged while others are over-discharged, reducing pack life and increasing risk.
So while this BMS can make the pack “work”, it is not an especially robust or long-life design.
If you plan to replace or upgrade the BMS, make sure:
- The pack is treated as 14S (14 series cells).
- The new BMS continuous discharge current rating is at least as high as your controller’s maximum demand.
- The BMS includes full over-charge, over-discharge, over-current, short-circuit, and temperature protections.
2. Cells: Panasonic NCR18650GA
Counting cells and connections reveals:
- Cell model: Panasonic NCR18650GA
- Nominal capacity: approximately 3300 mAh per cell
- High capacity and low internal resistance, a very solid choice for e-bikes
Pack configuration
The cell layout is:
- 14 series × 4 parallel (14S4P)
- Approximate electrical specs:
- Nominal voltage: ~51.8 V (14 × 3.7 V)
- Full charge voltage: ~58 V (14 × 4.2 V)
- Capacity: 3.3 Ah × 4 ≈ 13.2 Ah, practically around 13–14 Ah
So this is a standard 48 V mid-capacity e-bike pack.

Cycle life and aging
Even though Panasonic NCR18650GA cells are high quality, they still age with usage and environment:
- After a few hundred charge–discharge cycles, capacity loss becomes obvious.
- Once capacity falls below a certain point, range drops sharply.
- At that stage, many riders scrap the battery or whole bike – this teardown pack is a typical example.
3. Current Capability & Nickel Strip Limits
From the width and layout of the nickel strips, the pack’s theoretical maximum current is around 40 A, but a more realistic and safe recommendation is:
- Keep continuous discharge at or under 20 A.
Reasons:
- Each parallel group’s nickel strip can safely carry about 10 A.
- With all groups working, current can add up, but running near the limit for long periods will heat the strips and may even melt them.
- On an older, used pack, welds and nickel strips may already be degraded, increasing failure risk.
If you are an experienced DIYer and want to increase current capability, you might:
- Replace nickel with wider strips.
- Use a higher quality spot-welding setup.
But this requires proper equipment and skills; it is not recommended for typical users.
IV. Common Problems: Why the Battery “Dies”
Based on the teardown and typical e-bike usage, common failure modes include:
1. No Power / Bike Will Not Turn On
- BMS has tripped due to over-discharge, short-circuit, or over-current and cut off the output.
- One or more series groups are severely imbalanced, triggering a fault state.
- Power switch, connectors, or wiring harness are loose or corroded.
2. Sudden Range Drop
- Cells have lost capacity after many cycles.
- Without balancing, some series groups degrade earlier, so total capacity is limited by the weakest group.
- Some cells may have high self-discharge, draining the pack even when parked.
3. Weak Output / Poor Acceleration
- Nickel strips or welds have aged and increased resistance.
- BMS current limit is low, so it trips protection under heavy acceleration。
- Higher internal resistance causes large voltage sag, making the controller limit power early.
4. Safety Risks
- Some cells overcharged or over-discharged。
- Poor welds causing arcing and localized heating。
- Cracked housing allowing water ingress, leading to corrosion or short circuits。
Important:
- If you notice abnormal heat, swelling, leakage, or burning smell, stop using the battery immediately and move it away from flammable materials。
- Do not continue charging or attempt to “force discharge” a suspect pack; that only increases risk。
V. Repair, Rebuild, or Replace?
1. When Is “Repair / Rebuild” Worth Considering?
Repair or rebuild may be reasonable if:
- The cells overall are still healthy and only the BMS is faulty。
- Some welds or nickel strips are broken but the cells are not heavily aged。
- You can work with a skilled technician to replace the BMS or re-weld the pack。
Pros:
- You can reuse the original housing and mounting, keeping the bike’s appearance consistent。
Cons:
- Requires specialized tools and experience。
- Mistakes can introduce new faults and safety risks that are harder to diagnose。
2. When Is Full Replacement the Better Choice?
Full replacement is usually better if:
- Most series groups show low and uneven voltage on the multimeter。
- The bike has been used for years and range has dropped significantly。
- The original BMS is very basic, with no balancing and limited protection。
- You want significantly improved range and reliability, not just a temporary fix。
In many cases, technicians will suggest:
Instead of spending time and money chasing every small fault in an old pack, it’s often smarter and safer to replace it with a high-quality new battery.
VI. Can This Serengeti 48V Use a LiTime 48V Battery?

This section looks at three angles:
- Theoretical electrical compatibility
- Practical system and fit compatibility
- Real-world cases where LiTime 48V batteries power even heavier vehicles
1. Theoretical Compatibility: Yes
From the teardown:
- The original Serengeti battery is a 14S (48V system).
- Full charge voltage is around 58 V.
- Original capacity is around 13–14 Ah.
- The motor and controller are designed for a 48V system。
LiTime 48V batteries are also 48V / 51.2V LiFePO₄ packs, so the voltage platform matches. Their capacities (20Ah, 30Ah, etc.) are usually higher, which does not harm the controller – it only provides more range。
Therefore, from an electrical spec standpoint:
The Serengeti 48V e-bike can be matched with a LiTime 48V battery。
2. Practical Compatibility: 6 Things to Check
Even with matching voltage, confirm the following before you treat it as “plug and play”:
- Voltage match: The system must be 48V; do not use 36V or 52V packs with a 48V-only controller。
- Discharge current: The LiTime BMS continuous discharge rating should be greater than or equal to your controller’s maximum current draw。
- Physical dimensions: Check if the LiTime pack can fit inside the frame or if you will use a secure external mount (rear rack, custom bracket, etc.)。
- Connector compatibility: Confirm connector types (e.g., Anderson, XT60, XT90). If different, use an adapter harness and verify polarity with a multimeter。
- Charger compatibility: LiFePO₄ packs require compatible charger voltages and profiles. Ideally use a charger recommended for the LiTime pack。
- Mounting & protection: Ensure the battery is firmly fixed and all cables and connectors are insulated and protected from water and vibration。
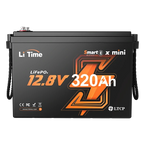
For most 48V e-bikes, a 48V 30Ah battery is already enough to cover daily commuting and leisure riding needs. If you prefer an off-the-shelf solution with extra features, LiTime offers several 48V 30Ah options you can consider:
- Standard 48V 30Ah pack for typical use: 48v 30ah battery

- Version with app monitoring and smart features: Bluetooth 48v 30ah battery

- Flexible installation option for more complex layouts: 48V 30Ah ComFlex battery

3. Real-World Proof: Vehicles Already Running on LiTime 48V Batteries
Two real-world cases show LiTime 48V batteries working reliably in vehicles that are heavier and more demanding than a typical e-bike:
Case 1: Garbage Collection Vehicle Using a LiTime 48V Battery
- Stronger power and smoother acceleration under heavy load。
- Significantly improved range, enough to complete full working routes。
- Stable battery temperature and reliable BMS operation。
- In daily service with no reported failures。
Case 2: Electric Tricycle Using a LiTime 48V Battery
- Stable running without frequent BMS cutoffs during high-current acceleration。
- Much better range, suitable for long-distance transport。
- Successfully tested on rough roads, bumps, and slopes。
- Already in regular on-road operation。
In both cases, the vehicle’s size, weight, and load demands are higher than a Serengeti e-bike. This strongly suggests:
If a LiTime 48 volt lithium battery can reliably power a garbage collection vehicle and an electric tricycle, then powering a lighter Serengeti 48V e-bike is easily within its capability, assuming the six compatibility checks are satisfied。
VII. General Safety Tips for Battery Teardown & Upgrades
- Always wear insulated gloves and eye protection。
- Never short the battery’s positive and negative terminals, even momentarily。
- Do not charge or work on batteries in damp, flammable, or explosive environments。
- Avoid leaving batteries charging unattended for long periods。
- If a pack shows abnormal heat, swelling, noise, or smell, stop using it immediately。
- Recycle scrap batteries properly; never discard them in regular trash。
- If you are unsure about wiring or connectors, verify with a multimeter instead of guessing。
VIII. Conclusion: Bringing Your Serengeti 48V Back to Life
This teardown shows that the original Serengeti 48V battery uses good NCR18650GA cells, but the simple BMS and lack of cell balancing hurt long-term performance and reliability. For an old pack with clear capacity loss, endlessly repairing it is often not cost-effective。
As long as you confirm compatibility in terms of voltage, size, connectors, and current capability, upgrading to a LiTime 48V battery is a very practical and safer solution:
- Higher capacity → longer range
- Better BMS → more stable output and more complete protection
- Longer life → fewer replacements and less downtime
Once you’ve checked compatibility, the next step is simple: give your Serengeti 48V e-bike a brand-new “heart” and let it get back on the road with more power and more range。


