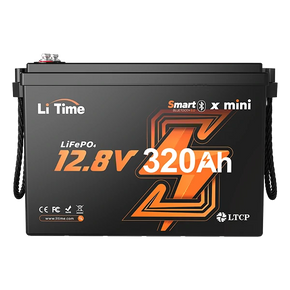


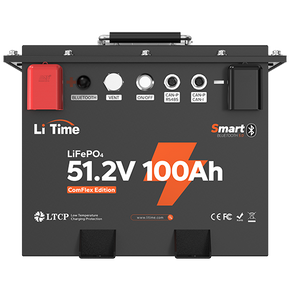

LiFePO4 lithium batteries have become the go-to power source for off-grid solar storage, RVs, marine vessels, home energy storage and outdoor power systems worldwide, thanks to their superior safety, ultra-long cycle life and ultra-low self-discharge rate. A battery monitor acts as the core auxiliary device that lets you track real-time charging/discharging metrics, remaining battery capacity, state of charge (SOC) and other critical data for your lithium battery bank.
We break down pre-installation preparation, step-by-step mounting & wiring, parameter setup, daily maintenance and troubleshooting FAQs, delivering authoritative, actionable guidance for both novice and experienced global users. Following this guide will help you operate your battery monitoring equipment correctly and fully protect your LiFePO4 battery system from overcharging, deep discharge and overcurrent risks.
- Part1: What do I need for battery monitor installation?
- Part2: How to install battery monitor? Step-by-Step Guide
- 2.1 Fully Charge the LiFePO4 Battery Bank First
- 2.2 Complete Core Wiring Connections
- 2.3 Mount the Shunt & LCD Display Screen
- 2.4 Installation for Series & Parallel LiFePO4 Battery Banks
- 2.5 Post-Wiring Full Inspection
- Part3: How to setup LiFePO4 battery for battery monitor?
- Part4: How to use your battery monitor daily?
- Part5: FAQs about battery monitor
- Part6: Final Conclusion
Part1: What do I need for battery monitor installation?
Verify Compatibility Between Monitor & LiFePO4 Battery Bank
Before purchasing or mounting any lithium battery monitor, cross-check key specifications to guarantee accurate readings and long-term stable operation:
- Voltage Range: Most standard battery monitoring systems support 8V–120V, covering 12V, 24V, 48V and 72V LiFePO4 battery packs. Confirm your monitor's rated voltage fully matches your battery bank's nominal voltage.
- Current Rating: Popular battery monitor models offer continuous current ratings from 100A up to 500A. Always select a shunt monitor with a continuous current higher than your system's maximum operating current to prevent shunt overload and overheating.
- Core Performance Metrics: Industry-standard lithium ion battery monitor units track capacity from 0.1Ah to 9999Ah, with voltage, current and capacity measurement accuracy within ±1.0%. Standby power consumption sits between 1mA–10mA for minimal parasitic drain.
- Operating Environment: Most battery monitors function reliably from -10°C to 60°C (14°F–140°F). For RV, marine or outdoor solar installations, avoid prolonged exposure to direct UV sunlight, which will degrade the LCD screen and shorten service life.
Gather All Required Tools & Included Components
Most mainstream shunt-style battery monitor packages contain identical core parts. Lay out all components before installation to avoid delays: Included factory parts, battery monitor, shunt, shielded wire, power wire, mounting screws and screwdriver. Additional recommended supplies: Insulated work gloves, torque wrench for precise bolt tightening.
Adhere to these safety rules for every battery monitor installation, regardless of brand or current size:
- Remove all metal objects near the battery terminals to eliminate short-circuit fire and electrocution hazards. Keep the entire battery bank far from open flames and sparks. Add safety goggles if working with lead-acid batteries.
- Never disassemble or modify the battery monitor LCD unit or shunt internally. There are no user-serviceable parts inside the device.
- Fully power down the entire battery system before starting wiring: flip off the main battery disconnect switch or detach all battery terminals to ensure zero live current.
Part2: How to install battery monitor? Step-by-Step Guide
Two main types of battery monitor exist on the market: shunt-based heavy-duty monitors (the most widely used for large LiFePO4 systems) and small direct-connect monitors. This walkthrough covers universal shunt monitor installation, compatible with single batteries and all series-parallel lithium battery banks.
2.1 Fully Charge the LiFePO4 Battery Bank First
Complete a full charge of your battery pack and measure its resting voltage to confirm it reaches the rated full-charge voltage before beginning wiring work.
2.2 Complete Core Wiring Connections
Three wiring sets must be installed: shunt main negative wiring, power wire wiring, and shielded wiring. For M8 terminal bolts, tighten all nuts to a torque of 12–14 N·m; avoid over-tightening (stripped threads) or under-tightening (loose connections causing heat and inaccurate readings).
1.Shunt B- Negative Terminal Wiring: Run a cable from your battery's total negative terminal to the B- port on the current shunt. Critical rule: No inverters, chargers or DC loads can be connected to the B- side of the shunt — any extra load here will bypass monitoring and skew all capacity and current data.

2.Shunt P- Load Negative Terminal Wiring: Connect the shunt's P- port to a shared negative bus bar. Link all MPPT solar chargers, inverters and DC loads to this bus bar. Every amp of current flowing into or out of the battery must pass through the shunt; this is the foundation of precise battery monitoring.

3.Positive Bus Bar & Power Wire Wiring: Link the battery's total positive terminal, all load positive terminals, and the positive ring terminal of the monitor power wire to a shared positive bus bar. Plug the opposite end of the power wire into the B+ terminal port on the shunt unit.

4.LCD Screen Signal Connection: Use the included shielded wire to connect the matching port on the shunt to the input port on the battery monitor LCD screen to complete data signal transmission.

2.3 Mount the Shunt & LCD Display Screen
1.Shunt Mounting: Secure the shunt to a flat, dry wall, battery rack or control cabinet using the included mounting screws and shunt holder. Reinforce mounting extra firmly for mobile RV and marine setups to prevent loose wiring from road or wave vibration.
2.LCD Display Screen Mounting: Cut a rectangular cutout in your control panel matching the screen's dimension template, then snap the LCD monitor into place until the side locking tabs fully engage. Mount the screen in an easily visible location away from standing water and high-temperature heat sources.
2.4 Installation for Series & Parallel LiFePO4 Battery Banks
The wiring logic remains unchanged for multi-series, multi-parallel or mixed series-parallel lithium battery systems. Assemble the internal battery bank wiring first (industry best practice: parallel cells first, then series strings), then run a single total positive and total negative lead from the entire battery bank to the shunt and bus bars following the single-battery wiring steps above. All system current will still route fully through the shunt for accurate battery monitoring.
2.5 Post-Wiring Full Inspection
Once all wiring is finished, conduct a thorough check: confirm no reversed positive/negative connections, all terminal bolts are torqued to spec, no cable insulation is damaged, and no wires are pinched or crossed.
Part3: How to setup LiFePO4 battery for battery monitor?
Accurate capacity percentage, voltage and SOC readings rely entirely on correct parameter configuration and full calibration after powering on your lithium battery monitor. Reference this step-by-step setup workflow for the LiFePO4 chemistries.Video Reference:
Enter the Monitor Settings Menu
Press and hold the dedicated settings button on the LCD screen to pull up the configuration page. Settings split into mandatory core values and optional adjustable alerts, with standardized LiFePO4 reference values listed below:
1.CAP (Usable Battery Capacity) – Mandatory: Set to the exact rated Ah capacity of your LiFePO4 battery pack.
2.Full V (Full Charge Voltage) – Mandatory: Set to 14.2V for the 12.8V LiFePO4, Set to 28.4V (14.2V × 2) for the 25.6V LiFePO4. Scale proportionally for 48V, 72V and higher series battery banks. The monitor automatically registers 100% SOC once voltage hits this threshold.
3.Zero V (Low Cutoff Empty Voltage) – Mandatory: Set to 10.8V for the 12.8V LiFePO4, Set to 21.6V (10.8V × 2) for the 25.6V LiFePO4. Scale proportionally for higher voltage packs. The monitor marks 0% SOC when voltage drops below this value, preserving a tiny reserve capacity (~1%) to power the monitor screen itself.
4.PowOff (LCD Auto-Shutdown Voltage) – Optional: Set to 10V for the 12.8V LiFePO4, Set to 20V (10V × 2) for the 25.6V LiFePO4. Scale proportionally for higher voltage packs. The screen backlight and display will power off automatically below this voltage to prevent deep battery depletion.
5.Alarm (Low Capacity Alert) – Optional: Set to your preferred low Ah threshold. When remaining capacity falls below this value, the LCD screen flashes and an internal buzzer beeps every 10 seconds to remind you to recharge.
6.Atten (Battery Degradation Ratio) – Auto-Calculated: No manual input required. The battery monitoring system automatically updates this value after every full charge-discharge cycle to track long-term lithium battery degradation.
Complete Mandatory Capacity Calibration
After setting all battery parameters, run this critical calibration step to lock in precise readings: Ensure the LiFePO4 battery bank is fully charged, then press and hold the upward adjustment key for 2 seconds. The monitor will auto-set the current capacity reading to 100% SOC, finishing the core calibration process for reliable long-term battery monitoring.
Part4: How to use your battery monitor daily?
Read the Standard LCD Battery Monitor Interface
Most mainstream lithium ion battery monitor screens feature identical labeled data fields for straightforward interpretation:
- Present Voltage: Real-time pack voltage
- Present Current: Positive values = charging; Negative values = discharging
- Present Power: Instant charge/discharge wattage
- Present Capacity: Remaining Ah
- Capacity Percentage: Real-time SOC %
- Remaining Charge/Discharge Time: Estimated runtime left at current loadA slow flashing battery icon on screen during charging is normal operation and requires no troubleshooting. Adjust screen brightness via the dedicated backlight key for clear visibility day or night.

Long-Term Maintenance Guidelines
- Regular Inspection: Check all terminal bolts for loosening and inspect wiring for cracked or frayed insulation. Increase inspection frequency for vibration-heavy RV and marine applications.
- Safe Cleaning: Wipe the LCD screen and shunt surface only with a dry microfiber cloth. Never spray or pour water directly on the battery monitor unit, as moisture will cause short-circuit damage.
- Long-Term Storage: If your LiFePO4 system will sit unused for months, disconnect the monitor's power wire entirely. Store the battery monitor in a cool, dry location shielded from direct UV light.
Part5: FAQs about battery monitor
Q1: Can I use the same installation steps for different brands and current-rated battery monitors?
A: Most shunt-style battery monitoring systems follow identical core wiring and installation logic. Minor differences only involve shunt physical size and terminal bolt specs (M8/M10). Always cross-reference the official product manual of your specific lithium battery monitor for brand-specific fine-tuning. Direct-connect small bluetooth battery monitor units skip the shunt wiring step and simply parallel to battery terminals for simpler installation.
Q2: The LCD screen does not light up after wiring — how do I troubleshoot?
A: Follow this ordered troubleshooting checklist:
- Inspect the power wire and shielded wire for loose or reversed plugs;
- Double-check all shunt terminal bolts are fully torqued;
- Test the battery pack for severe under-voltage or complete disconnection;
- Confirm the operating temperature stays within the -10°C ~ 60°C rated window.Resolve any issues found and reconnect the system to power the monitor screen.
Q3: The monitor shows drastically inaccurate capacity readings — what causes this and how to fix it?
A: Four root causes lead to skewed SOC data:
- Incorrect CAP, Full V or Zero V parameter values entered in settings menu;
- Improper shunt wiring with loads/chargers connected to the B- terminal;
- Loose terminal connections creating high resistance;
- Skipped full charge SOC calibration after setup.
Re-enter correct LiFePO4 battery values, rework faulty wiring, retorque all bolts, and re-run the 100% capacity calibration. Minor deviations within ±1.0% measurement accuracy fall within factory specifications and are normal.
Q4: Does the battery monitor drain significant power from my LiFePO4 battery bank?
A: No. Standard lithium battery monitor units draw only 1mA–10mA standby current, an extremely low parasitic load. Even with 24/7 continuous operation, the power draw is negligible for large-capacity lithium packs, making constant battery monitoring viable year-round.
Q5: Can a single battery monitor track multi-string series-parallel LiFePO4 systems?
A: Absolutely. Run a single total negative cable from the combined battery bank to the shunt unit to route all system current through the monitor shunt. All parameter setup rules remain identical to single-battery installations.
Final Conclusion
A quality battery monitor acts as the "eyes" of your LiFePO4 energy storage system. While different lithium ion battery monitor models vary in appearance and maximum current capacity, they share universal safety standards, installation workflows, parameter calibration rules and maintenance requirements.
This universal installation and calibration guide works with nearly every battery monitor sold on the global market. By selecting a properly sized lithium battery monitor and following standardized setup procedures, you unlock the full performance and maximum cycle lifespan of your LiFePO4 batteries. RV, marine, home solar and off-grid storage users gain complete visibility of real-time charging and discharging metrics, eliminating guesswork and unreliable visual estimations of battery state of charge.

