


A DIY camper battery kit gives you a flexible way to build an electrical system around the appliances, travel style, and charging sources you actually use. Instead of relying on a fixed all-in-one setup, you can choose the battery capacity, inverter, charger, solar equipment, wiring, and protection devices that fit your camper.
However, building a DIY camper battery kit involves more than simply connecting a battery to an inverter. You need to understand your daily energy consumption, choose compatible components, size cables and fuses correctly, and decide how the battery will be recharged.
This guide explains the major components, battery sizing, charging methods, installation basics, and series or parallel configurations involved in building a camper power system.
Do I Need a DIY Camper Battery Kit?
If you often travel or camp away from electrical hookups, or find that your camper’s factory power system cannot keep up with your daily energy needs, a DIY camper battery kit can be a practical solution to achieve more reliable and flexible off-grid power.
The biggest advantage of building your own camper battery system is flexibility. You can choose components according to your actual electrical needs rather than accepting a fixed package that may be too small, too large, or incompatible with your equipment.
A DIY system can also provide several practical advantages.
First, it is easier to expand. If your initial 100Ah battery is no longer sufficient, a properly designed system may allow compatible batteries to be added later.
Second, individual components can usually be replaced separately. A failed inverter, solar controller, or monitor does not necessarily require replacing the entire electrical system.
Third, you can optimize the charging system. Campers that drive frequently may prioritize alternator charging, while stationary campers may invest more heavily in solar.
Finally, building the system yourself helps you understand how energy flows through the camper, which can make future troubleshooting and upgrades easier.
How to DIY a Camper Battery Kit?
DIY Camper Battery Kit Required Components
A complete camper electrical system normally contains four groups of components: storage, charging, distribution, and power conversion.
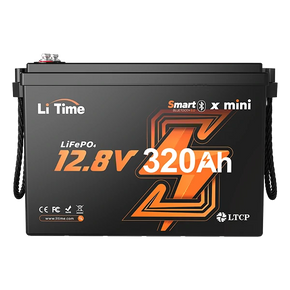
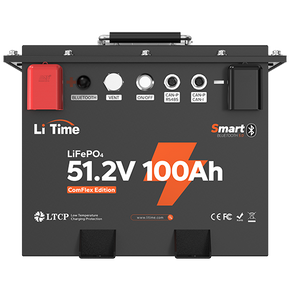
Battery: The battery stores energy for later use. LiFePO4 batteries are commonly used in camper systems because they provide deep-cycle performance and high usable capacity.
Main Fuse: A fuse installed close to the positive battery terminal protects the main cable against excessive current or short circuits.
Battery Disconnect Switch: A disconnect switch allows the battery bank to be isolated from the rest of the camper electrical system for maintenance or emergencies.
Busbars: Positive and negative busbars create central connection points for chargers, inverters, fuse panels, and other equipment. Busbars help keep large electrical systems organized.
DC Fuse Panel: The fuse panel distributes 12V power to individual circuits such as lighting, fans, pumps, and refrigerators.
Battery Monitor: A battery monitor measures important information such as voltage, current, energy consumption, and state of charge. Bluetooth-enabled lithium batteries may provide some monitoring directly through a mobile app.
Inverter: An inverter converts DC battery power into AC electricity. If you need to run appliances such as coffee makers, microwaves, televisions, or standard household outlets, an inverter may be required. The inverter should be sized according to the maximum simultaneous AC load rather than battery capacity alone.
DC-DC Charger: A DC-DC charger allows the camper battery to charge from the vehicle alternator while driving. It also regulates charging voltage and current, which is particularly important when charging LiFePO4 batteries.
Solar Charge Controller: A solar charge controller regulates electricity coming from solar panels before sending it to the battery. MPPT controllers are commonly used in camper solar systems because they can efficiently convert higher solar-panel voltage into suitable battery-charging voltage.
Cables, Lugs, and Terminals: Cable size must be selected according to current, cable length, allowable voltage drop, and system voltage. High-current equipment such as inverters requires much thicker cable than small 12V lighting circuits.
Fuses and Circuit Protection: Every major power source and circuit should have appropriate overcurrent protection. The fuse protects the cable, so fuse selection should consider both the expected current and the cable’s safe current capacity.
How to Properly DIY a Camper Power Kit?
Before building a DIY camper battery system, the most important step is not choosing equipment—it is clearly defining your power consumption needs and usage scenarios. The number of camping days, lifestyle habits, and appliance usage will directly determine the required battery capacity, solar input, and charging power.
When designing a system, it is also important to consider compatibility, scalability, and safety margins. Always ensure that all components (battery, inverter, charger, solar controller, and wiring) are properly matched in voltage and current ratings, and avoid undersizing cables or overloading the system.
1. Common Camping Appliances and Power Consumption
Below are typical power-consuming devices used in camper setups. Actual consumption may vary depending on brand, efficiency, and usage behavior:
| Device | Power Range | Daily Usage Time | Daily Energy Consumption (Wh) |
|---|---|---|---|
| LED lighting | 5–20W | 4–6 hours | 20–100Wh |
| 12V fridge | 40–80W (avg.) | 24 hours | 500–800Wh |
| Phone/Tablet | 10–30W | 2–4 hours | 20–100Wh |
| Laptop | 40–100W | 2–5 hours | 100–400Wh |
| Ventilation fan | 10–30W | 6–10 hours | 60–300Wh |
| Water pump | 30–60W | Intermittent | 20–80Wh |
| Coffee machine (via inverter) | 800–1500W | 10–20 min | 150–400Wh |
| Microwave (via inverter) | 1000–1500W | 10–15 min | 200–400Wh |
- 1–2 Day Short Trip Energy Requirement:Daily Consumption: ~1,200Wh;Total Energy (2 days): ~2,400Wh
- 3–5 Day Mid-Range Trip Energy Requirement:Daily Consumption: ~1,200Wh;Total Energy (5 days): ~6,000Wh
- 7+ Day Long-Term / Full Off-Grid Energy Requirement:Daily Consumption: ~1,200Wh;Total Energy (7 days): ~8,400Wh+
Selection note: Always calculate based on realistic usage, not theoretical maximum power, and include at least 20–30% buffer for inefficiencies and unexpected loads.
2. Energy System Configurations Based on Trip Duration
The following recommendations are based on a 12V LiFePO4 system, suitable for most camper vans and RV setups.
| Component | 1-2 Day Short Trip | 3-5 Day Mid-Range Trip | 7+Day Long-Term/Off-Grid System |
|---|---|---|---|
| Battery | 100Ah–150Ah LiFePO4 | 200Ah–300Ah LiFePO4 | 300Ah–600Ah LiFePO4 |
| Inverter | 1000W–1500W | 1500W–2000W | 2000W–3000W |
| Solar Panel | 200W–300W | 300W–600W | 600W–1200W |
| DC-DC Charger | 20A–30A | 40A | 40A–60A |
| Use Case | Weekend trips, light usage | Medium trips, light cooking | Full-time vanlife, long off-grid stays |
| Supported Loads | Fridge + lighting + phone + fan | Fridge + laptop + fan + coffee machine | Fridge + kitchen appliances + office equipment + entertainment system |
3.Key Considerations When Choosing a DIY Camper Battery Kit
When selecting a DIY camper battery kit, don’t just compare price or capacity. The system should match your real usage, safety needs, and future upgrades.
1. Match Energy Demand: Base the system on daily power use, not marketing specs. Add a 20–30% buffer to avoid shortages or overspending.
2. Ensure Compatibility: All parts (battery, inverter, charger, solar controller) must match in voltage and current to work safely together.
3. Use Proper Cables and Fuses: Undersized cables or weak fuses can cause overheating or failure. Always size them correctly for high-current devices.
4. Plan Charging Early: Decide in advance whether you’ll use alternator, solar, shore power, or a mix, as this affects system design.
5. Allow for Expansion: Choose a system that can grow with future needs, such as more batteries or added appliances.
6. Prioritize Safety (BMS): Lithium batteries must include a reliable BMS for protection against overcharge, over-discharge, heat, and short circuits.
7. Consider Installation Difficulty: Some systems are beginner-friendly, others require technical skills. If unsure, use professional installation.
8. Think Long-Term Value: Cheaper kits may lack quality or scalability. A better-designed system usually performs more reliably over time.
By considering these points, you can choose a DIY camper battery kit that is safe, efficient, and suitable for long-term travel.
DIY Camper Battery Types: Why Choose a Lithium Battery?
Camper electrical systems have traditionally used flooded lead-acid, AGM, or gel batteries, but LiFePO4 batteries have become increasingly common in modern camper builds.
Lead-acid VS LiFePO4 battery advantages include:
- High cycle life
- Fast charging capability
- Lower maintenance requirements
- High usable capacity
- Lower weight for equivalent usable energy
- Integrated BMS protection on many models

How to Install a DIY Camper Lithium Battery Kit
Alternator + Camper Battery Kit
Alternator charging is particularly useful for campers that move frequently.
Required kit:
- DC-DC charger kit
- Fuse kit (inline fuse or ANL fuse)
- Battery cable kit (proper gauge cables + lugs)
- Starter battery connection kit (optional wiring harness)
Basic installation:
Vehicle Alternator → Starter Battery → DC-DC Charger → Camper Battery
Install the DC-DC charger close to the camper battery. Connect the input side to the starter battery using fused positive and negative cables, and connect the output side directly to the camper battery or busbar. Ensure all connections are properly fused and securely crimped.
Solar Panel + Camper Battery Kit
Solar is useful for campers that spend long periods parked away from electrical hookups.
Required kit:
- Solar panel kit
- MPPT charge controller kit
- Solar mounting kit (roof brackets or portable stand)
- Solar cable kit with MC4 connectors
- Inline fuse kit
Basic installation:
Solar Panels → MPPT Charge Controller → Camper Battery
Mount the solar panels on the roof or use a portable setup. Connect panels to the MPPT controller using MC4 cables, then connect the controller output to the battery or busbar through a fused connection. Keep cable runs as short as possible for efficiency.
Alternator & Solar + Camper Battery Kit
Combining alternator and solar charging is one of the most flexible configurations for a traveling camper.
Required kit:
- DC-DC charger kit
- MPPT solar charge controller kit
- Solar panel kit
- Fuse & breaker kit
- Busbar kit (recommended for clean wiring)
- Battery cable kit
Basic installation:
Solar Panels → MPPT Controller → Battery
and
Alternator → DC-DC Charger → Battery
Both systems connect to the same battery bank through separate controllers. Install the DC-DC charger between starter and house battery, and install the MPPT controller between solar panels and battery. Use busbars to centralize connections and ensure all positive lines are properly fused.
This hybrid setup allows solar charging while parked and alternator charging while driving, providing a stable and flexible off-grid power system.
Read More: LiFePO4 Battery Installation & Wiring Guide: Step-by-Step
DIY Camper Battery Kit in Parallel & Series
Multiple lithium batteries are often used in a DIY camper battery kit to scale energy storage, and they can be configured in either parallel or series depending on the system design and power requirements.
Parallel Connection
In a parallel setup within a DIY camper battery kit:

All positive terminals are connected together, and all negative terminals are connected together.
This configuration keeps the system voltage the same while increasing total usable capacity (Ah), which directly extends off-grid runtime.
For example:
Two 12V 100Ah batteries in parallel become a 12V 200Ah battery bank.
Four 12V 100Ah batteries in parallel become a 12V 400Ah battery bank.
Parallel wiring is the most common approach in 12V camper electrical systems because most RV appliances, DC fuse panels, and inverters are designed to operate at 12V. It is the preferred method when the goal is to expand storage capacity without changing the rest of the camper power system.
Series Connection
In a series configuration within a DIY camper battery kit:

The positive terminal of one battery is connected to the negative terminal of the next battery.
This increases system voltage while keeping amp-hour capacity the same.
For example:
Two 12V 100Ah batteries in series create a 24V 100Ah system.
Four 12V 100Ah batteries in series create a 48V 100Ah system.
Higher-voltage configurations are sometimes used in larger DIY camper power systems because they reduce current draw for the same power output. Lower current means less voltage drop, smaller cable requirements, and improved efficiency over longer cable runs—especially in high-power camper setups with large inverters or heavy AC loads.
Read More: Batteries in Parallel vs Series: How to Correctly Connect Your LiFePO4 Batteries
Conclusion
A well-designed DIY camper battery kit should start with your actual energy usage, not the largest battery size. First calculate daily watt-hour consumption and expected off-grid duration, then size the battery bank accordingly and match it with suitable charging methods such as alternator, solar, or shore power. For most camper builds, a LiFePO4 battery is the recommended energy choice due to its high usable capacity, long lifespan, and stable performance.

