


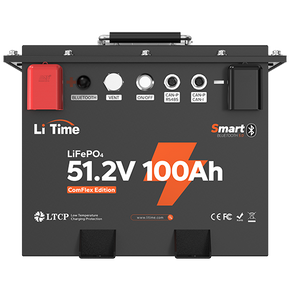

Labor Day weekend is one of the last big boating weekends of summer—and often one of the busiest. Before you launch, take a few minutes to verify that your battery is charged, your charging system is compatible, your electrical connections are secure and your required safety gear is ready.
Check the battery’s state of charge and physical condition, confirm the charger matches the battery chemistry and voltage, test every critical electrical load, and complete a full pre-departure safety check. Do this at home or at the dock before the ramp gets crowded.
Table of Contents
- Quick Labor Day Boating Checklist
- 1. Make Sure Each Boat Battery Has the Right Job
- 2. Check State of Charge Before You Leave Home
- 3. Inspect the Battery Compartment and Connections
- 4. Verify the Charger Matches the Battery
- 5. Test the System Under Real Loads
- 6. Check the Rest of the Boat Before Launch
- 7. Review Required and Recommended Safety Gear
- 8. Check Weather, Crowds and Your Float Plan
- 9. Perform a Five-Minute Ramp-Side Check
- Make the Last Big Weekend Count
- Frequently Asked Questions
Quick Labor Day Boating Checklist
Use this list the day before your trip:
- Confirm the starting battery and house or trolling motor battery are the correct types for their jobs.
- Fully charge each battery with a compatible charger.
- Inspect battery cases, cables, terminals, fuses and breakers.
- Secure batteries against movement and protect terminals from accidental contact.
- Test engine starting, trolling motor, bilge pump, navigation lights, horn and electronics.
- Check charger cables and shore-power connections for heat or damage.
- Carry one serviceable, properly sized U.S. Coast Guard-approved wearable life jacket for each person.
- Check fire extinguishers, visual distress signals and sound-producing devices as applicable to your boat and waters.
- Verify the drain plug, fuel level, propeller and steering.
- Review the marine weather forecast and local advisories.
- File a float plan with a responsible person.
- Bring a charged phone and an appropriate backup communication method.
Federal requirements are minimums, and state rules may add requirements. Check the rules for the state and waterway where you will operate.
1. Make Sure Each Boat Battery Has the Right Job
A battery can look healthy and still be wrong for the load. Start by identifying what each battery powers.
| Battery Role | What It Does | What to Verify |
|---|---|---|
| Starting battery | Delivers a short burst of current to crank a compatible engine | Engine manufacturer’s required cranking rating, voltage and battery type |
| Deep-cycle battery | Runs trolling motors, fish finders, lights and other sustained loads | System voltage, expected current, usable capacity and BMS current limits |
| Dual-purpose battery | Combines starting and deep-cycle functions when specifically designed and approved for both | Cranking rating plus usable energy for accessory loads |
Do not assume any deep-cycle lithium battery can start an outboard. Use a model specifically designed and rated for marine starting, and verify compatibility against the engine manufacturer’s requirements. Likewise, a starting battery should not automatically be treated as the best battery for hours of trolling or house loads.
If your boat uses separate starting and trolling banks, label the cables and confirm that every disconnect switch is in the correct position before testing.
2. Check State of Charge Before You Leave Home
Fully charge the battery early enough to investigate a problem—preferably the day before the trip, not while people are waiting at the ramp.
For a battery with built-in monitoring, check its state of charge in the applicable app or display. For other batteries, follow the battery manufacturer’s recommended method. A voltage reading taken while the battery is charging or supporting a load may not accurately represent its resting state of charge.
If a battery will not reach or hold its expected charge:
- Stop and check charger compatibility and settings.
- Inspect connections, fuses and breakers.
- Review the battery and charger manuals for warning indicators or protection states.
- Do not bypass the BMS or protection devices to force charging.
- Contact the manufacturer or a qualified marine electrician if the cause is unclear.
Never rely on an untested battery for a holiday trip simply because it worked on the previous outing.
3. Inspect the Battery Compartment and Connections
Turn off loads and charging sources before inspecting the electrical system. Follow the manufacturer’s shutdown procedure and avoid placing tools across battery terminals.
Check the following:
- Battery case: Look for swelling, cracks, impact damage, leaks, unusual odor or evidence of overheating. Stop using a damaged battery.
- Mounting: Confirm the battery is restrained so it cannot slide, tip or bounce in rough water.
- Terminals: Look for loose hardware, corrosion, discoloration or heat damage. Tighten only to the manufacturer’s specified torque.
- Cables: Inspect insulation for cuts, abrasion, stiffness, melted areas or exposed conductor.
- Cable size: Confirm the conductor and insulation are suitable for the maximum current and marine installation.
- Overcurrent protection: Check that correctly sized fuses or circuit breakers are installed where required and are not bypassed.
- Terminal protection: Use covers or a battery box to reduce the risk of tools or gear shorting the terminals.
- Moisture: Keep the compartment clean and dry. A water-resistance rating does not mean a battery should be submerged.
A connection that is only slightly loose can create resistance and heat under a high load. If a terminal, cable or connector becomes unusually warm during a controlled test, stop and investigate before departure.
4. Verify the Charger Matches the Battery
The charger must match both the battery chemistry and nominal system voltage. A charger intended for a lead-acid battery may use charging stages or voltage settings that are inappropriate for a LiFePO4 battery.
For a LiTime marine LiFePO4 battery, use a compatible charger and follow the exact battery and charger manuals. Depending on the system, charging may come from:
- An AC-to-DC LiFePO4-compatible battery charger.
- Solar panels through a properly configured solar charge controller.
- An alternator or generator through an appropriate charging method, such as a compatible DC-to-DC charger where required.
Before charging, verify:
- Charger output voltage matches the battery or battery bank.
- The charging profile is approved for that exact battery.
- Charge current stays within the battery’s specified limit.
- Polarity is correct.
- Plugs, cables and connectors show no damage.
- The charging area meets the equipment manufacturer’s environmental and ventilation requirements.
- The battery temperature is within the model’s permitted charging range.
Low-temperature charging capability varies by model. Some batteries include low-temperature charging protection or self-heating, while others do not. Never assume these features are present—check the exact product manual.
Choose by Battery Job and Charging Need
| Application | Recommended Category | Best For | Key Check | Action |
|---|---|---|---|---|
| Engine starting | Marine starting battery | Gasoline outboard cranking and reserve support | Confirm engine-approved CCA / MCA requirements | Shop |
| Trolling motor | Trolling motor batteries | 24V or 36V bow-mounted propulsion | Match motor voltage and maximum current draw | Shop |
| Marine electronics | Marine batteries | Fish finders, lights, pumps and onboard accessories | Calculate expected amp-hour or watt-hour use | Shop |
| Charging | LiFePO4 battery chargers | Compatible charging for lithium battery systems | Verify voltage, profile and current limits | Shop |
5. Test the System Under Real Loads
A no-load voltage check is not enough. Test the equipment you expect to use on the water.
Start the engine according to its manual, then separately test the trolling motor at several speed settings. Switch on the fish finder, chartplotter, livewell, bilge pump, navigation lights and other critical accessories. Watch for dimming lights, resets, alarms, intermittent operation or hot connections.
For a rough energy estimate, use:
Runtime (hours) ≈ battery energy (Wh) × usable fraction × system efficiency ÷ average load (W)
Example: a nominal 12.8V 100Ah battery contains about 1,280Wh. If the planning assumptions are 90% usable energy and 85% overall efficiency, a 200W average load gives:
1,280Wh × 0.90 × 0.85 ÷ 200W ≈ 4.9 hours
This is a planning estimate, not a guarantee. Trolling motor draw changes sharply with speed, while wind, current, hull load, temperature, wiring losses and battery age can reduce real-world runtime. Keep a reserve for the return trip rather than planning to use every available watt-hour.
6. Check the Rest of the Boat Before Launch
Battery power is only one part of a safe departure. Complete these mechanical and operational checks:
- Install the drain plug.
- Check fuel and oil where applicable, and inspect for leaks.
- Inspect the propeller for damage and fishing line.
- Confirm steering and throttle move correctly.
- Test the bilge pump in automatic and manual modes, if equipped.
- Verify navigation lights and the horn or other sound-producing device.
- Secure anchors, paddles, dock lines and loose gear.
- Stay within the boat’s capacity limits for passengers and load.
- Make sure the operator understands the boat and wears the installed engine cut-off switch link when required.
The U.S. Coast Guard recommends checking the vessel before every departure and specifically calls out easy-to-forget essentials such as the drain plug.
7. Review Required and Recommended Safety Gear
At minimum, carry one wearable U.S. Coast Guard-approved personal flotation device for each person. It must be serviceable, properly sized, appropriate for the activity and readily accessible. Boats 16 feet or longer generally must also carry a throwable flotation device, with exceptions including canoes and kayaks. Children’s life-jacket rules and state requirements may be stricter.
Also verify the equipment applicable to your boat and operating area:
- Fire extinguisher.
- Visual distress signals with valid dates where required.
- Navigation lights.
- Sound-producing device.
- First-aid kit.
- Anchor and adequate line.
- Manual backup propulsion for a small boat when practical.
- VHF marine radio, personal locator beacon or EPIRB appropriate to the trip.
- Basic tools and correctly rated spare fuses.
Required equipment depends on boat length, propulsion, construction, location and operating conditions. Consult current federal guidance plus your state boating agency.
8. Check Weather, Crowds and Your Float Plan
Labor Day waterways and ramps can be busy. Check the marine forecast shortly before departure and continue monitoring conditions on the water. Pay attention to wind, waves, thunderstorms, visibility and any small-craft advisories relevant to the trip.
Leave a float plan with someone who will remain ashore. Include:
- Names and contact information for everyone aboard.
- Boat description, registration number and a current photo.
- Launch point, planned route and destination.
- Departure and expected return times.
- Vehicle and trailer information.
- Communication and emergency equipment carried.
Tell that person exactly what to do if you are overdue, and close the plan when you return. A social media post or casual mention of where you are going is not a substitute for a complete float plan.
9. Perform a Five-Minute Ramp-Side Check
Before backing down the ramp:
- Confirm the drain plug is installed.
- Remove transom tie-downs while keeping the bow secured until launch.
- Load gear away from the active ramp whenever possible.
- Turn on the battery switch and verify critical electronics.
- Confirm life jackets are accessible—not buried under bags.
- Check that dock lines and fenders are ready.
- Review passenger seating, no-wake rules and the departure plan.
If a battery alarm appears, the engine cranks slowly or a high-current connection becomes hot, move out of the ramp queue and troubleshoot. Holiday pressure is never a reason to launch with an unresolved electrical problem.
Make the Last Big Weekend Count
A reliable Labor Day boating trip starts before the trailer moves. Match every battery to its job, charge it with compatible equipment, inspect the high-current connections, test the actual loads and leave enough reserve to get home. Then complete the safety, weather and float-plan checks that protect everyone aboard.
If your current setup cannot reliably support your starting, trolling motor or onboard accessory loads, compare purpose-built LiTime marine battery options by application—and confirm the exact model, charger and system requirements before purchasing or installing.
Frequently Asked Questions
Should I fully charge my boat battery before a Labor Day trip?
Charge it to the level recommended by the manufacturer and verify that it holds charge before departure. Complete charging the day before when possible, so there is time to diagnose a charger, connection or battery problem.
Can I use a regular lead-acid charger on a LiFePO4 boat battery?
Only if the battery and charger manufacturers explicitly confirm compatibility and the charging profile meets the battery’s requirements. The safer default is a charger designed or configured for the exact LiFePO4 battery voltage and charging limits.
Can a deep-cycle lithium battery start my boat engine?
Not necessarily. Use a lithium battery specifically designed and rated for marine starting, and confirm that its cranking performance and compatibility meet the engine manufacturer’s requirements. Many deep-cycle batteries are not starting batteries.
How can I tell whether a boat battery connection is loose?
With the system safely powered down, inspect for movement, corrosion, discoloration and damaged hardware. During a controlled load test, flickering electronics, voltage drop or abnormal heat can indicate excessive resistance. Follow the specified terminal torque rather than guessing.
What battery reserve should I keep for the return trip?
There is no universal percentage because wind, current, speed and load vary. Plan conservatively, monitor consumption and turn back well before the battery approaches its operating limit. Never base the return plan on ideal laboratory runtime alone.
Sources and claim-verification notes
● U.S. Coast Guard, A Boater’s Guide to the Federal Requirements for Recreational Boats (revised November 2023): federal/state scope, PFDs, throwable devices, visual distress signals, engine cut-off switch, weather, float plans and pre-departure checks.
● BoatUS Foundation, Trip Checklist: supplemental pre-trip checklist.

