



Winterizing a camper for full-time winter living is different from preparing an RV for seasonal storage. A stored RV can be drained and shut down; an occupied RV must keep water, heat, electricity, batteries, waste systems, and appliances operating every day in freezing conditions. The goal is therefore active freeze protection, safe load management, moisture control, and regular inspection - not simply filling every line with antifreeze.
The most important rule is to follow the owner manuals for your specific RV and installed appliances. RV construction varies widely: some models have heated enclosed plumbing and tanks, while others leave vulnerable lines or valves exposed. The ten systems below cover the areas most likely to create winter problems for full-time RVers.
- 1. Water System Winterization
- 2. Heating System Winterization
- 3. RV Battery Winterization and Self-Heating LiFePO4 Options
- 4. Propane System Winterization
- 5. Condensation and Moisture Control
- 6. Holding Tanks and Sewer System
- 7. Seals, Slide-Outs, and Roof
- 8. Shore Power and Electrical System
- 9. Tires and Chassis
- 10. Refrigerator, Water Heater, and Other Appliances
- Final Full-Time Winter RV Checklist
1. Water System Winterization
Water expands as it freezes. Exposed hoses, fittings, pumps, valves, exterior showers, water-heater lines, and plumbing near outside walls can freeze even when the living space is warm. A full-time winter RV usually needs to keep the freshwater system operational, so the strategy is to keep vulnerable plumbing above freezing rather than winterize the entire potable system for storage.
Common winter problems: Frozen city-water hoses, cracked fittings, damaged water-pump components, frozen faucets, reduced flow, and leaks that become visible only after thawing.
Useful materials: A heated potable-water hose, pipe insulation, self-regulating heat cable specifically approved for the pipe/hose material, RV skirting where appropriate, insulated wet-bay protection, spare fittings, and remote temperature sensors for vulnerable compartments.
Preparation and installation: Use a heated drinking-water hose if you stay connected to campground water. Protect the campground riser and RV inlet only with methods allowed by the campground and equipment manufacturer. Insulate accessible plumbing near exterior walls and keep heated wet bays unobstructed. If the external connection cannot be protected reliably, disconnect the hose and operate from the onboard freshwater tank, provided the tank and related plumbing are within a heated/protected area.
Antifreeze clarification: RV-approved propylene-glycol antifreeze is appropriate when the plumbing is being winterized or drained according to the RV manual. It should not be routinely diluted into an actively used drinking-water system. After a system has been winterized with antifreeze, flush and sanitize it before using the water for drinking or cooking.
Maintenance timing: During hard freezes, check the water source, heated hose, wet-bay temperature, and exposed fittings daily. Inspect for leaks after freeze-thaw events. Replace filters according to the filter manufacturer's capacity/interval or when flow and water quality indicate replacement.
2. Heating System Winterization

Heat protects not only occupants but also plumbing, tanks, batteries, and some appliance spaces. A furnace failure can quickly create freezing conditions in an RV that was relying on cabin heat to keep hidden plumbing warm.
Common winter problems: Blocked combustion vents, weak airflow, ignition faults, depleted fuel, low 12V supply to the furnace blower/control board, thermostat faults, and poor performance caused by dirty return-air paths or restricted ventilation.
Choosing heat: There is no universal "best" heater. A manufacturer-approved propane furnace is common because it can heat the living area and, in many RVs, enclosed plumbing spaces. Properly installed diesel heaters can be effective in some RV or van builds. Electric space heaters can reduce fuel use when adequate shore power is available, but they add substantial electrical load and must be used on circuits that can safely support them.
Preparation: Run the primary heater through a complete test cycle before severe weather. Confirm return-air and supply-air paths are open, exterior intake/exhaust vents are clear, and smoke/CO/LP detectors are operational. Keep snow and ice away from combustion vents. Any fuel-burning heater must be installed and serviced according to its manufacturer; do not improvise exhaust wrapping, clearances, or vent routing.
Maintenance timing: Check exterior vents after snow, ice, or wind events. Monitor unusual cycling, delayed ignition, soot, odors, or airflow changes. Clean filters and service combustion components only at the intervals specified by the heater manufacturer or a qualified RV technician.
3. RV Battery Winterization and Self-Heating LiFePO4 Options
Winter increases electrical demand while reducing charging opportunities. Furnace blowers, tank heaters, lights, pumps, routers, electronics, and inverters may run longer, while solar production can fall because of short days, clouds, or snow cover. Low temperature also affects battery charge acceptance and available power.
Lead-acid vs LiFePO4: Lead-acid batteries are inexpensive and widely supported, but cold temperatures reduce available capacity and deep discharge accelerates sulfation. LiFePO4 batteries provide more usable capacity, longer cycle life, faster charging, lower weight, and steady output. The key winter limitation is charging temperature: many LiFePO4 batteries restrict charging at or below freezing unless the battery has low-temperature protection or a self-heating design.
Recommended winter features: For full-time cold-weather RVing, prioritize a battery with low-temperature charge protection, self-heating if charging in the cold is expected, a properly sized BMS, and convenient SOC/temperature monitoring.
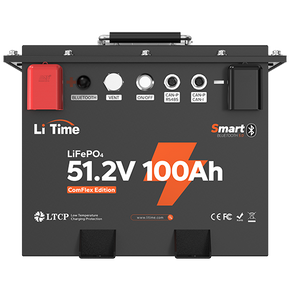
LiTime self-heating batteries are optimized for full-time RV winter use. Built-in automatic heating pads activate at low temperatures to maintain a safe charging range, eliminating cold-charging risks. Equipped with intelligent BMS protection, they prevent over-discharge, short circuits, and low-temperature cell damage, delivering consistent power output throughout winter.

Preparation: Verify charger compatibility with the battery chemistry, inspect cable size and connection condition, protect the battery from direct weather exposure, and place temperature sensors where they reflect actual battery conditions. Do not seal a battery into a box that violates the manufacturer's installation or ventilation requirements. Keep enough SOC reserve to support overnight furnace and safety loads.
Maintenance timing: Monitor SOC, battery temperature, charging current, and BMS alerts during cold spells. Recheck cable condition periodically and verify terminal torque only when required by the battery/connection manufacturer. There is no general need to retighten terminals weekly or perform monthly capacity calibration unless the specific battery documentation calls for it.
4. Propane System Winterization
Full-time winter RVers can consume propane quickly because the furnace may run for many hours each day. Cold weather also makes regulator ventilation, tank level, and uninterrupted fuel supply more important. Ice, snow, contamination, or a damaged regulator/connector can interrupt appliance operation.
Common winter problems: Low fuel level, regulator vent obstruction, ice/snow around appliance vents, damaged hoses/connectors, ignition faults, and reduced vaporization capacity when demand is high and temperatures are very low.
Preparation: Make sure cylinders/tanks are correctly secured, appliance vents are unobstructed, and the regulator is properly mounted and protected as designed. Keep the regulator vent clear and oriented as required. Never apply an external heat source to a propane tank and do not wrap a regulator in a way that blocks its vent. If a gas leak is suspected, shut off the supply if it is safe to do so and contact a qualified professional.
Leak checks and repairs: Accessible connections can be checked with an approved leak-detection solution when the RV/appliance manufacturer permits it. Do not indiscriminately reseal propane fittings: flare fittings and threaded fittings require different methods, and gas-line repairs should be completed according to NFPA/RV manufacturer requirements by qualified personnel.
Maintenance timing: Monitor propane level frequently during cold periods, inspect vents after storms, and visually inspect hoses/connectors for damage. Arrange pressure/leak testing and component replacement at the intervals specified by the RV, regulator, hose, and appliance manufacturers.
5. Condensation and Moisture Control
Breathing, showering, cooking, wet clothing, and propane combustion all add moisture to a small living space. Warm indoor air condenses on cold windows, frames, walls, and poorly insulated corners, which can lead to mold, corrosion, soft furnishings staying damp, and hidden structural damage.
Common winter problems: Window condensation, damp mattress bottoms, musty cabinets, mold in corners, corrosion on metal hardware, and moisture around slide-outs or cold exterior walls.
Useful materials: A hygrometer, dehumidifier when power allows, roof/ceiling ventilation fans, window insulation appropriate for the RV, thermal curtains, small air circulators, and moisture absorbers for closed storage areas.
Preparation and use: Vent during cooking and showering, circulate air behind furniture and inside cabinets, and avoid blocking designed appliance or furnace ventilation. A general indoor relative-humidity range around 30%-50% can be a useful starting point, but in very cold weather you may need a lower humidity level if condensation persists on cold surfaces.
Maintenance timing: Check windows and cold corners daily in severe weather. Inspect under mattresses and inside closed cabinets weekly. Empty dehumidifiers and replace/desiccate moisture absorbers based on their actual fill/saturation level rather than a fixed calendar interval.
6. Holding Tanks and Sewer System
Gray and black tanks, dump valves, termination pipes, and sewer hoses can freeze if they are exposed or unheated. Frozen valves and hoses can stop normal waste handling and can crack components as contents expand.
Common winter problems: Frozen dump valves, ice in termination pipes, cracked fittings, blocked sewer hoses, and inaccurate level readings caused by residue on tank sensors.
Useful materials: Factory or manufacturer-approved tank heaters, approved pipe/valve heat protection, insulated underbelly/skirting where appropriate, sewer-hose support, and RV-approved holding-tank antifreeze when freezing risk and product instructions justify it.
Preparation and use: Confirm tank heaters are functional before severe cold. Protect exposed valves and drain plumbing with listed products compatible with the material. Avoid leaving a sewer hose full of liquid in freezing temperatures. Keep the black-tank valve closed during normal use and dump when the tank is sufficiently full or as the RV/toilet manufacturer directs so waste has enough liquid to evacuate properly.
Maintenance timing: Monitor tank-heater operation and exposed valves during freezing weather. Dump based on tank level and usage, not a fixed every-2-or-3-day schedule. Clean sensors when readings become unreliable and inspect insulation/heater-pad adhesion periodically.
7. Seals, Slide-Outs, and Roof

Freeze-thaw cycles, snow, ice, and wind can expose small gaps around roof penetrations, windows, doors, and slide-outs. Water intrusion may not become obvious until insulation, wall panels, or subfloor materials have already been affected.
Common winter problems: Cracked or lifted sealant, compressed or damaged rubber seals, water staining, drafts, frozen slide seals, and leaks after snow melts.
Preparation: Inspect roof seams, vents, skylights, windows, doors, and slide seals before winter. Use only sealants and rubber-care products approved for the exact roof membrane and seal material; EPDM, TPO, fiberglass, and other systems have different compatibility requirements. Repair active leaks promptly.
Maintenance timing: Inspect from a safe location after major storms or freeze-thaw events. Avoid climbing onto an icy roof. Perform a hands-on roof and seal inspection at the frequency recommended by the RV manufacturer and whenever water staining or drafts appear.
8. Shore Power and Electrical System
Winter often adds continuous electrical loads such as space heaters, tank heaters, heat cable, battery chargers, and dehumidifiers. Overloaded circuits, poor campground voltage, loose/damaged plug contacts, moisture, or inappropriate extension cords can overheat equipment or trip protection devices.
Common winter problems: Hot or discolored plugs, nuisance breaker trips, low/high pedestal voltage, open-neutral or wiring faults, damaged shore cords, moisture around connections, and inverter/charger alarms.
Preparation: Use a shore cord and adapters listed for the RV service rating and an electrical management system (EMS) or appropriate surge/voltage protection. Keep plug-and-receptacle connections dry and fully seated. Do not use lightweight household extension cords for sustained RV loads. If using electric heaters, calculate the total circuit load so that heaters, water heating, chargers, and kitchen appliances do not overload the branch circuit or shore connection.
Maintenance timing: Regularly inspect plugs, receptacles, and cords for heat, discoloration, cracking, or moisture. Stop using any connection that becomes unusually hot. Internal terminal tightening, breaker replacement, and panel service should be done de-energized and according to manufacturer torque/specifications, preferably by a qualified technician.
9. Tires and Chassis
Ambient temperature changes alter tire pressure, while road salt, slush, and moisture can accelerate chassis corrosion. Stationary RVs also place long-duration loads on tires, leveling systems, and stabilizers.
Common winter problems: Underinflation, uneven loading, cracking or damage, corrosion, frozen stabilizer pads, and packed snow/ice around underbody components.
Preparation: Measure tire pressure when the tires are cold and set it to the vehicle placard and/or tire manufacturer load-and-inflation table based on actual axle/tire load. Do not intentionally add extra pressure above the required cold inflation pressure simply because winter temperatures are expected. Use stable jack/stabilizer pads as appropriate and keep road salt from accumulating on vulnerable chassis areas.
Maintenance timing: Check cold tire pressure before travel and during significant temperature changes. Inspect tire condition, wheel hardware, brakes, and undercarriage according to the chassis/RV maker's maintenance schedule. Rinse road salt when conditions allow.
10. Refrigerator, Water Heater, and Other Appliances
RV appliances may depend on combinations of propane, 12V DC, shore power, and exterior ventilation. Snow or ice can block vents, while very low ambient temperatures can affect some appliance types and exposed water connections.
Common winter problems: Blocked intake/exhaust vents, ignition faults, frozen water-heater plumbing, reduced performance of some absorption refrigerators in extreme cold, and electrical overload when multiple appliances and heaters operate together.
Preparation: Keep exterior refrigerator, furnace, and water-heater vents clear. Insulate exposed water lines only with materials approved for the installation. Check the refrigerator manual for low-ambient controls or winter covers, because procedures vary by model. Service or descale the water heater according to its exact manual and local water quality rather than using a universal quarterly schedule.
Maintenance timing: Watch appliance performance during severe cold, inspect exterior vents after storms, and investigate unusual odors, soot, noises, ignition delays, or error codes promptly. Follow the appliance manufacturer's specified maintenance and qualified-service requirements.
Final Full-Time Winter RV Checklist
Winter failures are often connected. A low battery can stop the furnace blower; lost heat can freeze plumbing; frozen plumbing can create leaks when it thaws. Build your winter plan around heat, water, power, and safe ventilation.
- Protect active plumbing with heat, insulation, and a reliable water-source strategy.
- Test the primary heater and keep combustion/airflow vents clear.
- Use a battery system with enough overnight reserve and cold-temperature charging protection.
- Keep propane available, secured, properly vented, and professionally serviced when faults are suspected.
- Control humidity and inspect hidden cold surfaces for condensation.
- Protect tanks, dump valves, and sewer plumbing from freezing.
- Inspect roof, window, door, and slide seals using compatible sealant products.
- Manage shore-power loads and use properly rated cords plus EMS/voltage protection.
- Set tire pressure from actual cold-inflation requirements - never by adding arbitrary winter pressure.
- Keep appliance vents clear and follow each appliance manual for winter operation/service.
For RVers who routinely charge batteries in freezing conditions, a LiTime self-heating LiFePO4 battery can be a useful part of the winter power strategy. Match the battery model to the RV's voltage, current demand, charger, installation space, and expected temperature range, and follow the model-specific self-heating and low-temperature protection instructions.

